

Make A Photo Floral Centerpiece

I've established in previous posts how much I love using photos to decorate my house (Turning Photos Into Art and A Family Photo Timeline). Photos make any decorating project more personal, sentimental, and unique. It's also inexpensive to decorate with photos.
I also like to incorporate photos into party decorations. They always make the occasion more personal. For example, you can check out my posts about
- Baby Shower Centerpieces using baby photos of the mommy- and daddy-to-be
- Wedding Rehearsal Dinner Centerpieces using photos of the couple and monogrammed mugs
So, when my friend Sandy asked me if I would make 6 table centerpieces for her sister's 6oth birthday party, I immediately thought that this was a perfect occasion to incorporate photos into the party decor. I asked Sandy if she had some photos of Shelley throughout her 60 years that I could use in the centerpieces. Sandy, who loves photos every bit as much as I do, got them to me at lightening speed. (It's always fun to work on a project with Sandy--she knows how to GET IT DONE!)
I also enjoy challenging myself to do a project like this as cheaply as possible. Sandy didn't ask me to keep the cost down, but it's just how we roll. I set out to make something pretty and special AND inexpensive. I also didn't have much time to devote to this, so I couldn't get too fancy or fussy--also how Sandy and I roll.
Here's how I made 6 Photo Floral Centerpieces for Shelley's 60th birthday party.
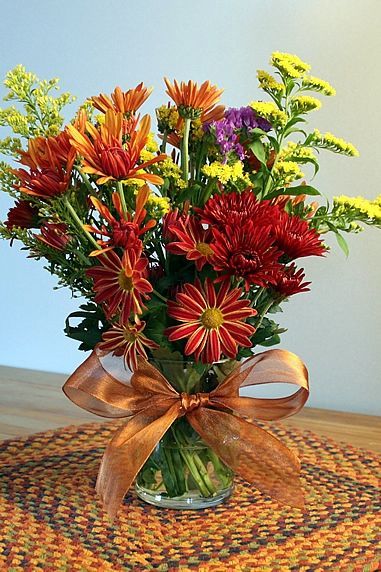
Step 1. Arrange the flowers. I bought 5 different kinds of flowers--fall colors for a November birthday. Got them at Sam's for a total of $25. I bought 6 small, clear glass vases at the Dollar Store for, well, a buck a piece = $6. I made 6 identical flower arrangements and tied a bow around the vase. They looked like this:
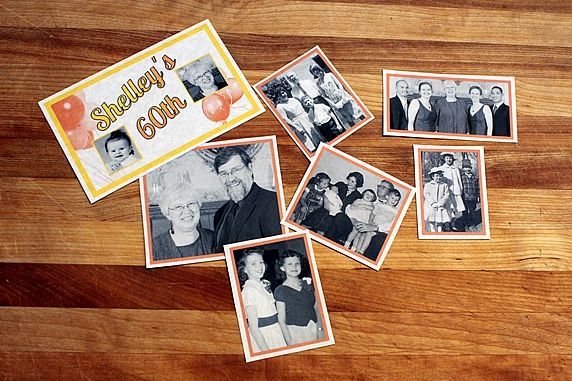
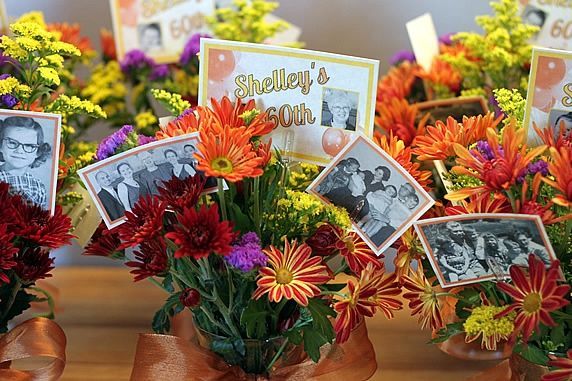
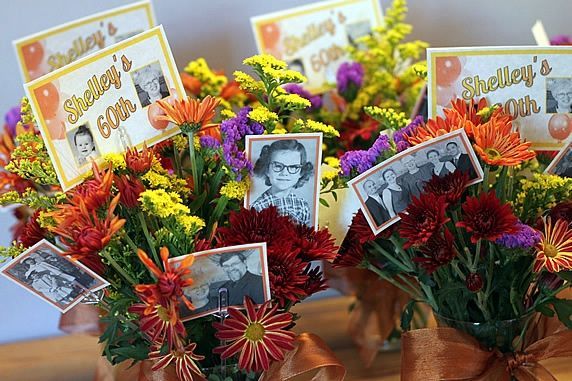
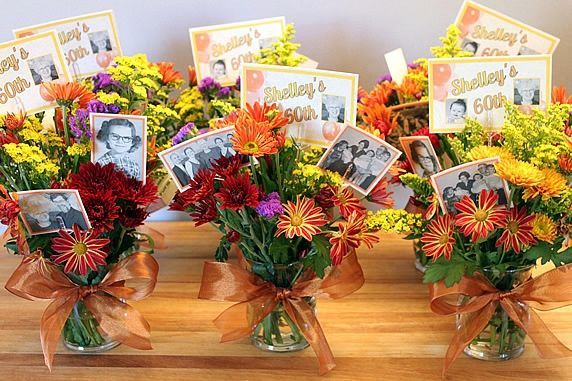
Step 2: Make a birthday sign for the centerpieces. I created this "Shelley's 60th" card in Microsoft Publisher. It can be done in Word, too, or any number of software options that are most likely already on your computer. I scanned and included a baby and current photo of Shelley, and some downloadable balloon clipart. The colors of the border, title, and balloons were made to coordinate with the fall colors of the flowers.

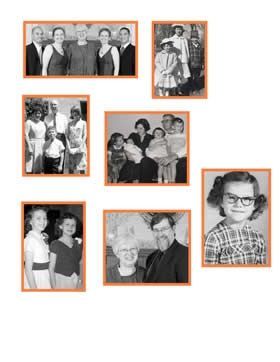
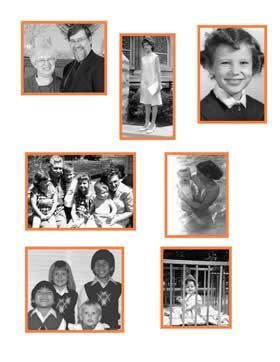
Step 3: Scan a variety of photos through the years. Some of these were color photos, but I converted them all to black and white (used Picasa's free editing software). Color photos get lost when mixed in with the colorful flowers. Making all of the photos black and white makes them stand out more and gives the centerpiece a more unified appearance. Sandy provided photos that included many of the people who would be at the party. That makes the centerpieces more meaningful and fun for Shelley and the party guests. After scanning the photos, converting them all to black and white, and resizing them, I gave them all a matching orange border. The border adds a little color that coordinates with the fall flowers. I thought too many border colors would be too busy.
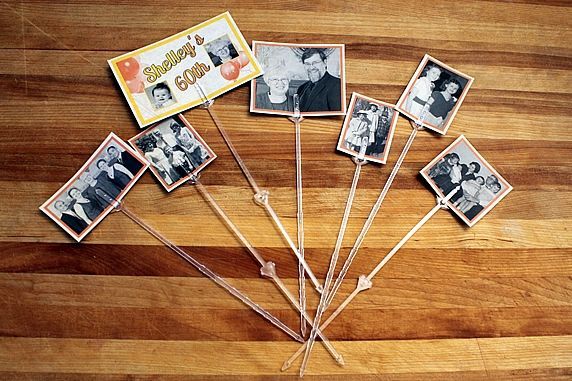
Step 4. Print the birthday sign and photos. I printed these on a parchment colored card stock.
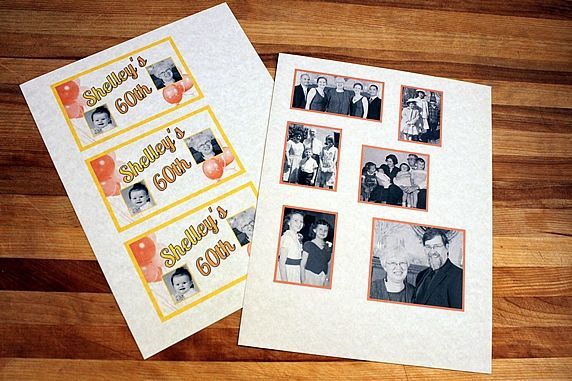
Step 5. Cut out the birthday signs and photos.
Step 6. Attach the birthday signs and photos to floral card holder picks.
Step 7. Insert the floral picks into each bouquet. I put the "Shelley's 60th" birthday card at an angle (so you don't have to worry about keeping it straight) at the top of the arrangement. There are 2 of these birthday cards on each bouquet--back to back on the same pick so they're visible from both sides. Each bouquet had 5 photos, scattered so there were photos to view from each side of the bouquet. That way guests seated all around the table could see a photo.
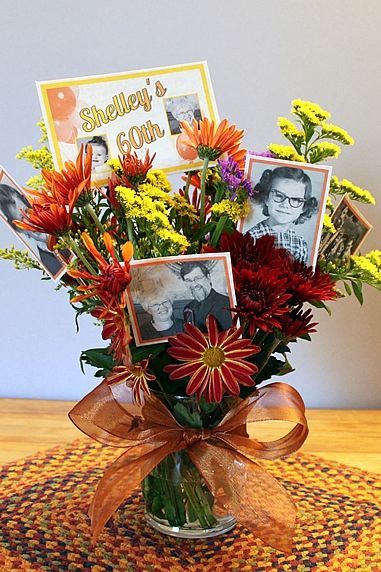
Finished! These centerpieces serve as fun conversation pieces. Everyone likes looking at photos.
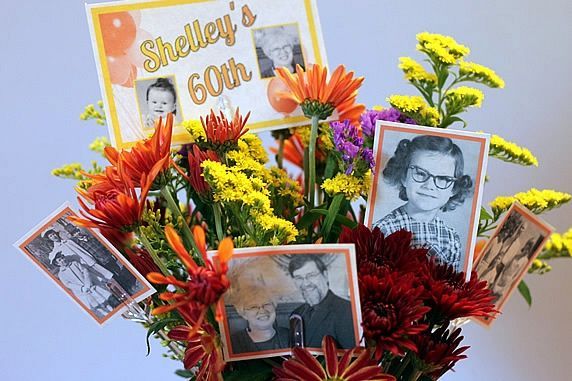
I mixed up the photos so that no 2 arrangements were exactly alike. A couple of photos were used more than once, but every arrangement had mostly different photos. That way guests can walk around to view the photos on each table--great for getting conversation going between guests at different tables.
Sandy reported that the centerpieces were a hit. We accomplished the mission: pretty, special, inexpensive, and fast to make.
Total cost of the six centerpieces: approx. $34. Under six dollars a piece. Not bad.
This idea can be adapted for any holiday or special occasion by changing the colors and photo themes. Here are some ideas:
- Halloween centerpiece with photos of kids in costumes through the years.
- A Thanksgiving centerpiece with photos from previous thanksgivings, or this year's guests, or things you are thankful for.
- A Christmas centerpiece with favorite gift opening photos through the years.
- A baby shower centerpiece with baby photos of the mom and dad.
- A wedding shower, rehearsal dinner, or reception centerpiece with photos of the couple together.
- An Easter centerpiece with photos of egg hunts through the years.
- A wedding anniversary centerpiece with photos of the couple through the years.
- Retirement parties with photos of the retiree through the years.
So many possibilities. Can you think of more?
Make it a yummy day!