

A December Baby Shower Brunch--Decorating, Favors, and Food
Last weekend, I co-hosted a baby shower brunch with my friend, Bonnie. The mommy-to-be, Becca, is the daughter of our long-time friend, Sandy. This was one of those full circle moments in life--Becca was a tiny girl when I first met her and our families became neighbors and friends. Now that little girl is expecting a baby of her own. A baby boy, due in early 2011. What a sentimental occasion. It was so fun to plan a special day celebrating the upcoming arrival of Becca and her hubby Jason's baby boy.
In this post, I will explain how I made the table centerpiece and party favors. This is an idea that could be adapted for any December celebration, like a birthday or retirement party. I combined two themes--Christmas (can't get away from that theme in my house in December) and Baby Boy. I incorporated photos in the centerpieces--if you've read my past posts, you know I love photos. (Check out my post on using photos for a 60th birthday floral centerpiece for Becca's Aunt Shelley.)
I'm going to share:
- How to make centerpieces for a December Baby Shower
- The perfect, easy seasonal party favor
- An easy brunch menu--recipes will be coming in future posts
How to make centerpieces for a December Baby Shower
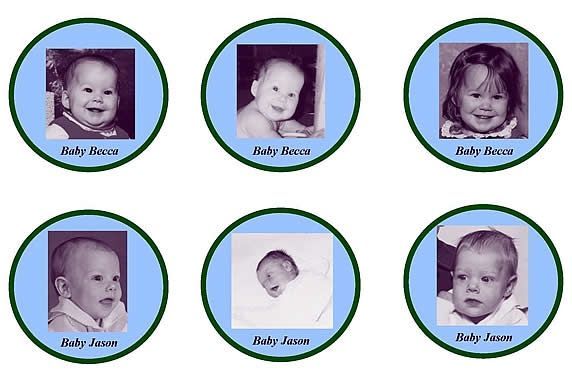
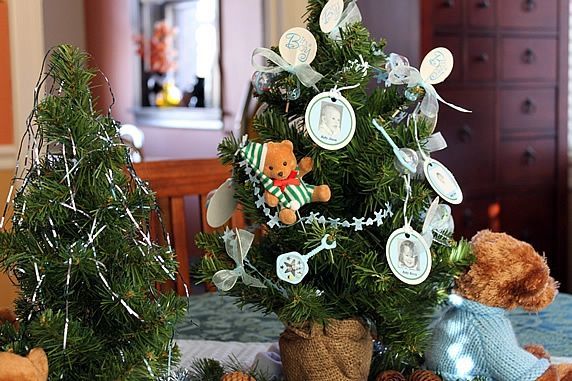
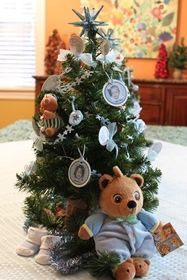
I used baby photos of the mommy- and daddy-to-be to decorate 3 miniature Christmas trees. That way, Becca and the two grandmothers could all take home a decorated tree after the shower--something fun to enjoy during the holidays.
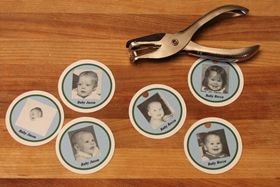
Step 1. On my computer, I scanned 3 photos of Baby Becca and 3 photos of Baby Jason that their mothers were kind enough to provide. I cropped the photos to similar shapes and sizes and converted them all to black and white to give the centerpieces a more unified look.


Step 2. I created blue circles with green borders and inserted the photos. I used Microsoft Publisher software for this. You can also do this in Word and numerous other software programs. Chances are that you already have the software you need on your computer. This is a pretty basic function, and not hard to do.
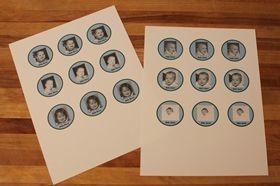
Step 3. On white cardstock, I printed 2 sheets that included 3 copies of each photo (one of each photo for each of the 3 trees).
Step 4. Cut around each circle. You can do this carefully with a pair of scissors. I used my favorite circle cutting tool that makes this step really easy. It is made my Creative Memories.
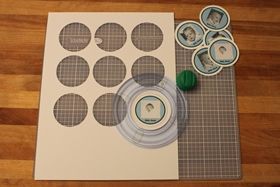
Step 5. Punch a hole at the top of each circle.
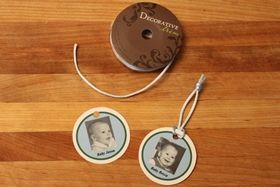
Step. 6. Tie a ribbon or string through the hole. Voila! Baby Becca and Baby Jason photo ornaments!
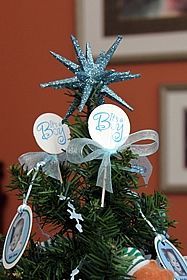
Other ornaments for the tree included these miscellaneous items that I found at Walmart and Hobby Lobby. The "It's A Boy" picks are made for decorating cupcakes. I tied blue ribbons around them and used them as tree decorations.
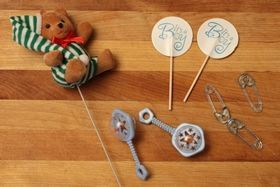


The wooden pick went through the hole in the end of a plastic baby pin. That was easy to attach to a tree branch.
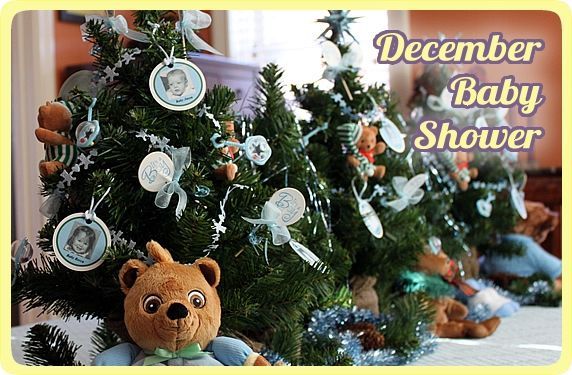
Here's how the trees looked on the table. I first covered the table with a large green tablecloth, and then added a blue square tablecloth centered at an angle.
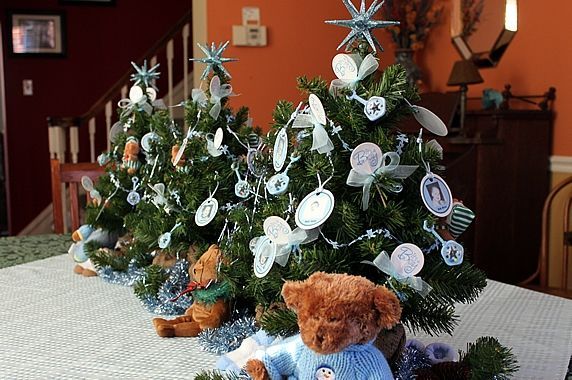
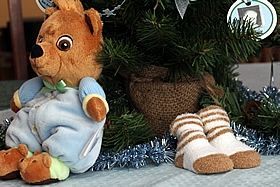
Bonnie and I had decided on a teddy bear theme, so I tied that into the tree decorations. I found blue teddy bear ribbon that I used as garland on the trees. I also found several different teddy bears to sit around the base of the trees.

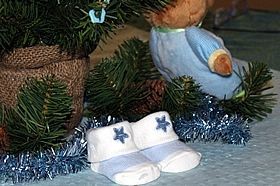
Between each of the 3 bigger decorated trees, I put a smaller tree. I used some blue metallic gift bag shred filler to decorate the smaller trees--it looked like tinsel.
I added some twigs of greens with pine cones around the base of the trees, and then wove around some blue metallic garland.
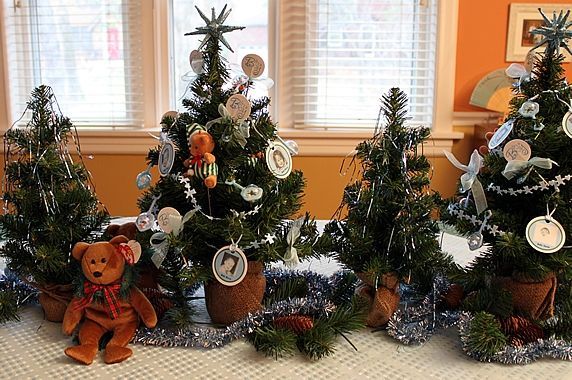
The star on top of the tree was a Christmas ornament turned upside down. A one dollar ornament from Walmart.
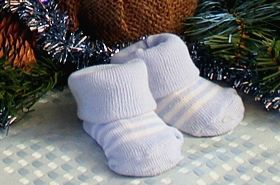
Target had baby boy socks that came with plastic forms inside them. That way they could "stand" at the base of the trees. Dang, they were tiny. Are baby feet really that small? I always forget how teensy those little feet can be. And cute. Very, very cute. After the shower, the bears and socks were gifts for the baby for Becca to take home.

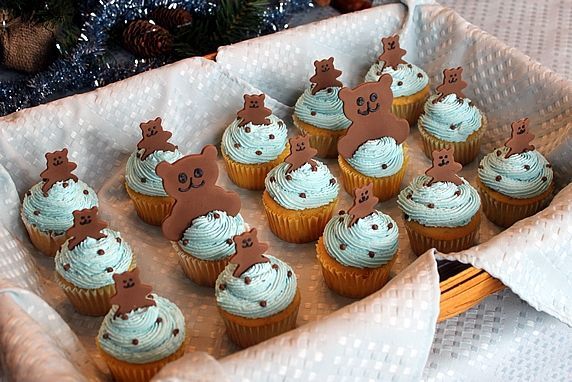
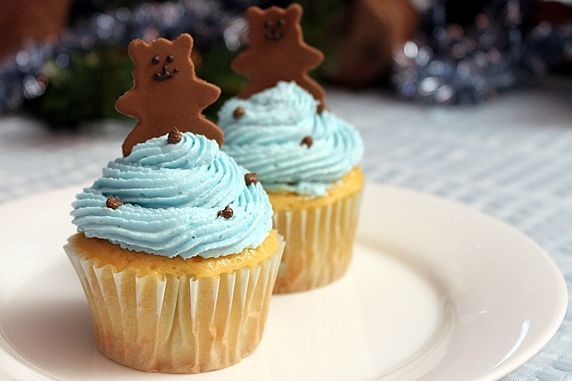
Cupcakes set the teddy bear theme.
Bonnie's friend, Carrie, made these adorable teddy bear cupcakes for the shower. How perfect! And, they were delicious, too. I love food that doubles as decoration. These were yellow cake with a chocolate filling. SO good!
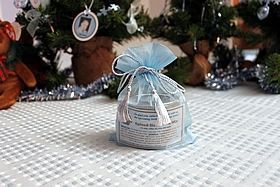
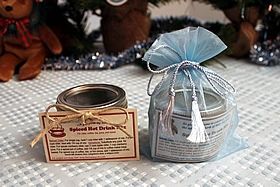
The perfect party favors for the season.
For party favors, we gave each guest a 4 oz. jar of my Spiced Hot Drink Mix from a previous post. We served hot cider made with this mix at the shower, and then sent every guest home with some of their own. I prepared the jars exactly as explained in my post, Make A Spiced Hot Drink Mix Gift Jar; except, I put the jars inside a pretty blue fabric gift bag. This is an easy, inexpensive give that is perfect for this season of the year.

The Brunch Menu.
Bonnie and I prepared a menu that was easy to cook and easy to feed to a large group (we had 22 guests). Everything was prepared the day before and could be baked at the same temperature the hour before the shower began. That made the day so much easier and stress free. Our brunch menu included 2 different baked egg casseroles, hash brown casserole, and Pull-Apart Sticky Buns. Becca's friend, Merideth, brought a beautiful fresh fruit platter that was the perfect finishing touch.

Make it a yummy day!